STEP 1 – Add Tom
Tom corresponds to the starting of the real time experience on every build template.
In the editor it is represented by a humanoid figure with ~1.70mt of height.
We experienced problems with import scale working with various import files, especially during first times using Unity: once you have Tom inside your scene you can automatically understand if the units of your input file are correct.
To add Tom in the scene simply click on “Create starting point (TOM)” in the Scene Tab.
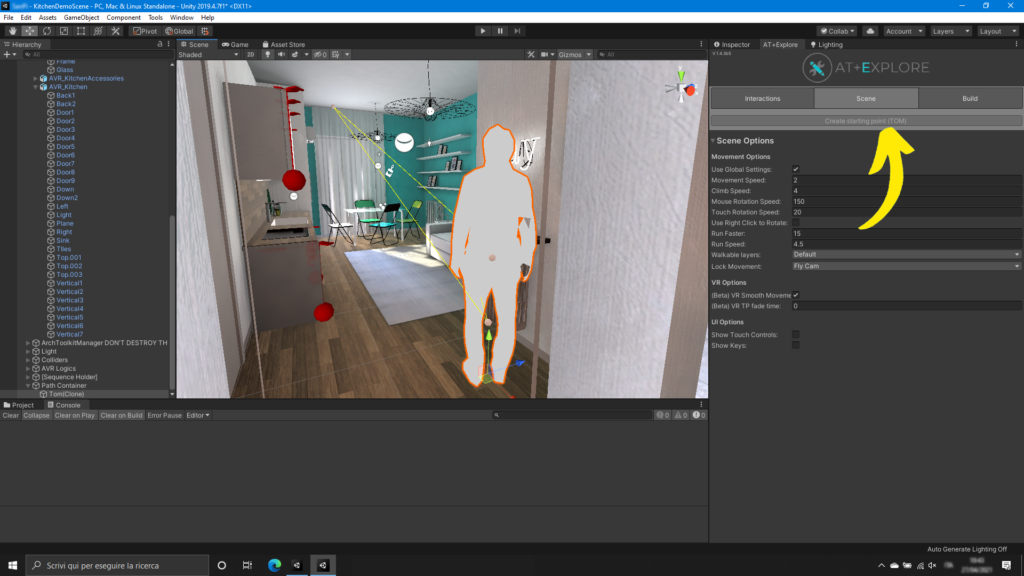
Don’t worry about placing Tom precisely on the floor. The system will automatically set the height of the character once you play your scene.
NB: Tom can walk automatically on every surface that has the Default Layer. If your scene has different layers and you want to walk on these you can add them in the Walkable Layer mask.
That’s it! you can now just hit play and move freely in your scene.
STEP 2 – Add interactions
Once our starting point has beenset up we can start adding dynamicity to our scene. AT+Explore has a prebuilt set of interactions available directly on the Interaction tab.
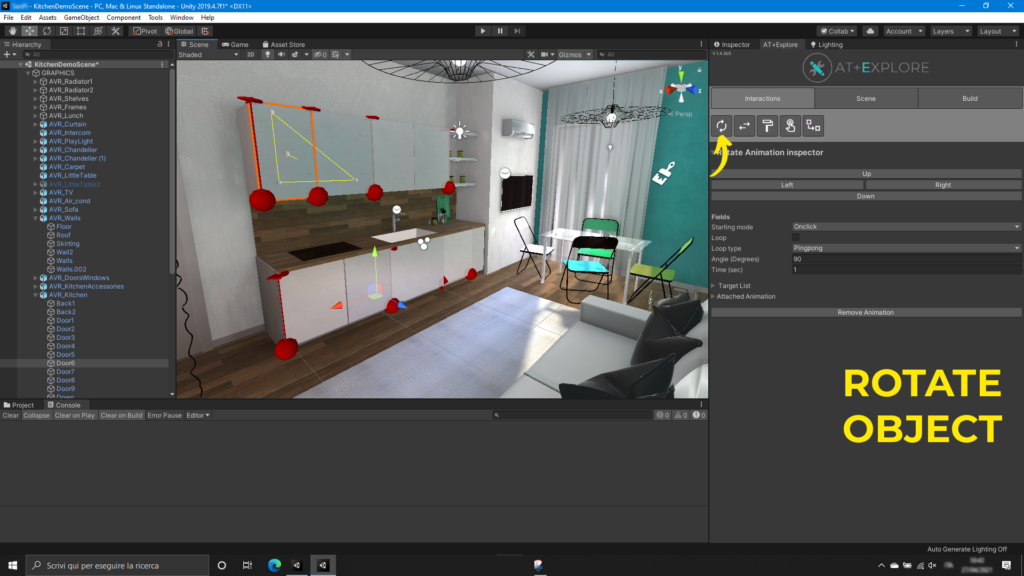
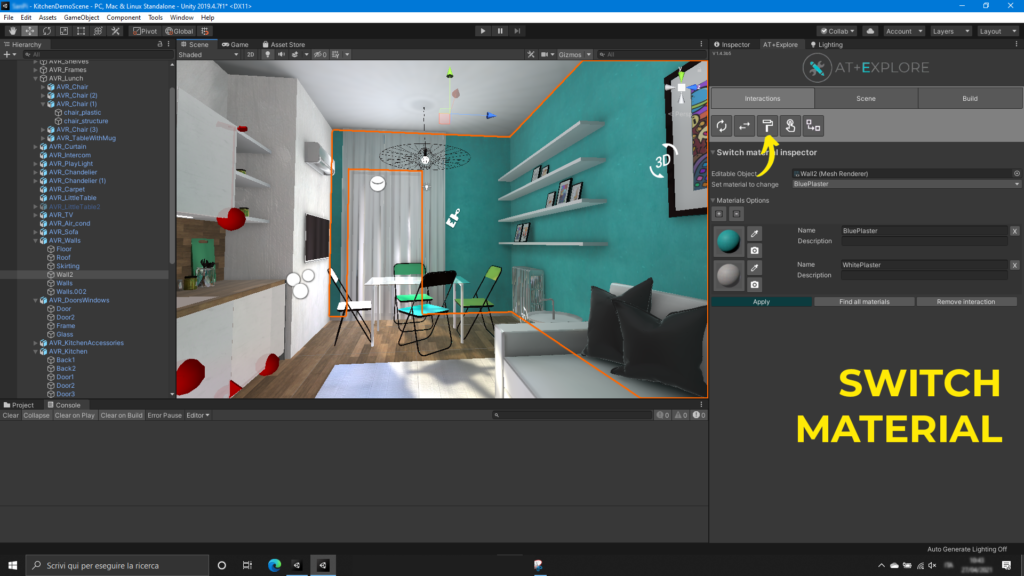
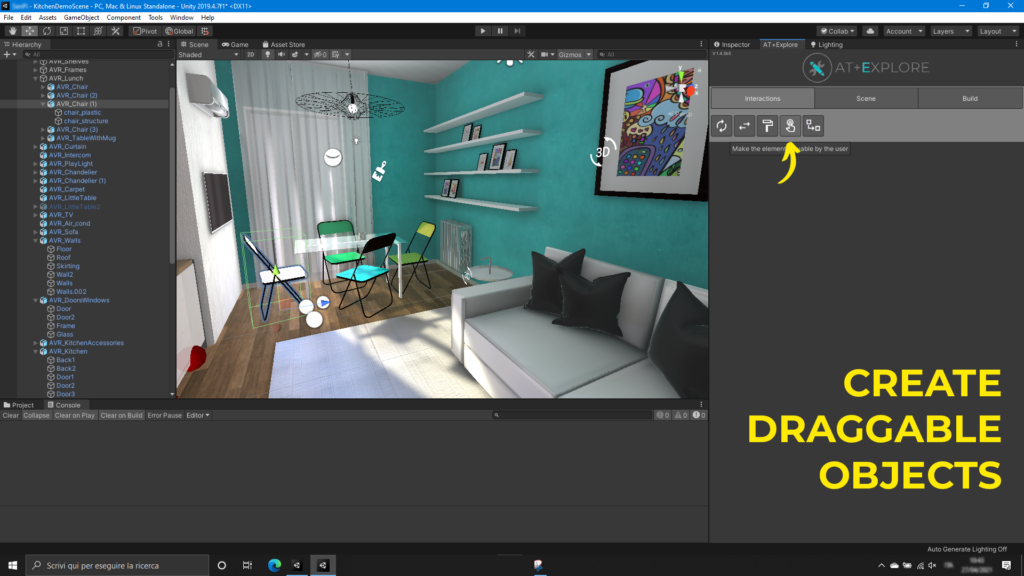
The process to add a prebuilt interaction is the same for each interaction:
- Select the mesh/object to animate
- Select the interaction to add
- Edit the interaction options using the inspector available below the interaction buttons.
In the above figures we have just added some rotation to the branches of kitchen, you can try this on the demo scene available in the package.
STEP 3 – choose the visualization type
Starting from v1.2 all the managed possibilities are listed in the build tab.
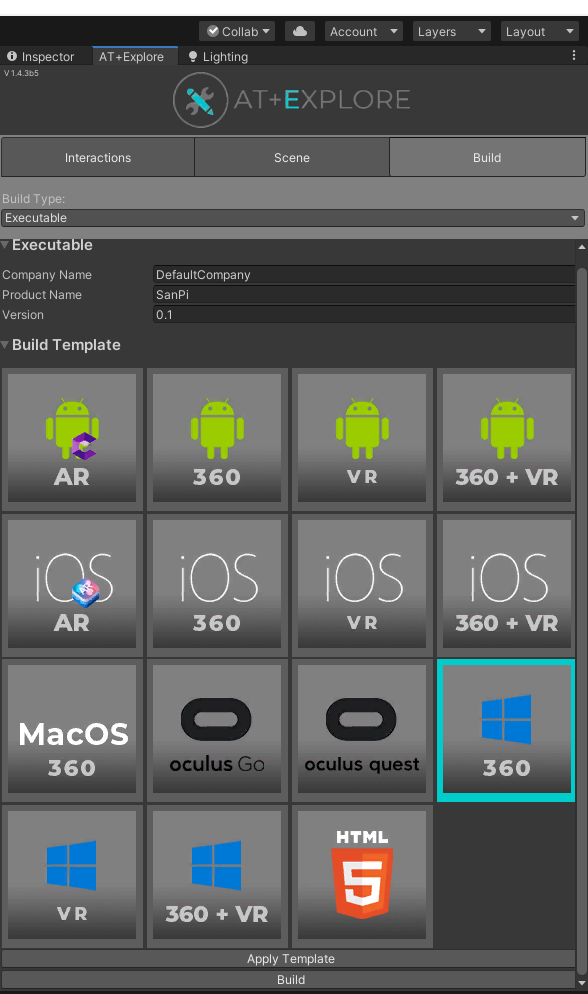
Just select the type of visualization you need and click on “apply template”, the plugin will automatically set all options and packages for you.
Available build templates:
- Android: 360, VR, VR/360 or AR (added in v1.3)
- iOS: 360, VR, VR/360 or AR (added in v1.3)
- MacOS: 360
- Oculus GO
- Oculus Quest
- Windows: 360, VR, VR/360
Once you have set up the build template you can press the “build” button that will open the Unity Build Settings dialog where you can add scenes and choose other build options.