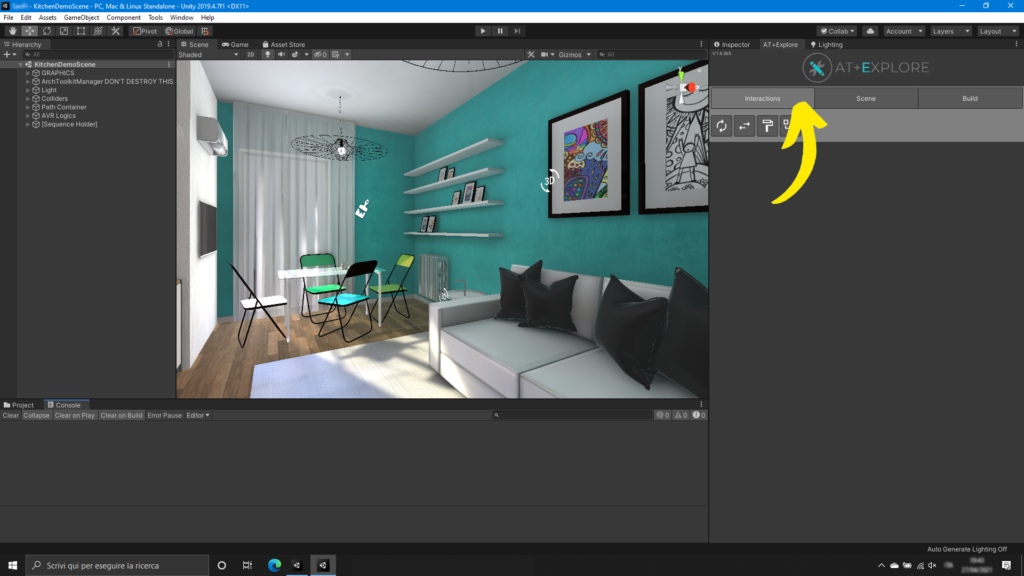
Open the AT+Explore panel
AT+Explore is a single panel in the Unity Editor containing every function.

To open the panel, click on the top menu: Tools > Ambiens > ArchToolkit > AT+Explore
Explore the panel options
The panel is composed of three main tabs:
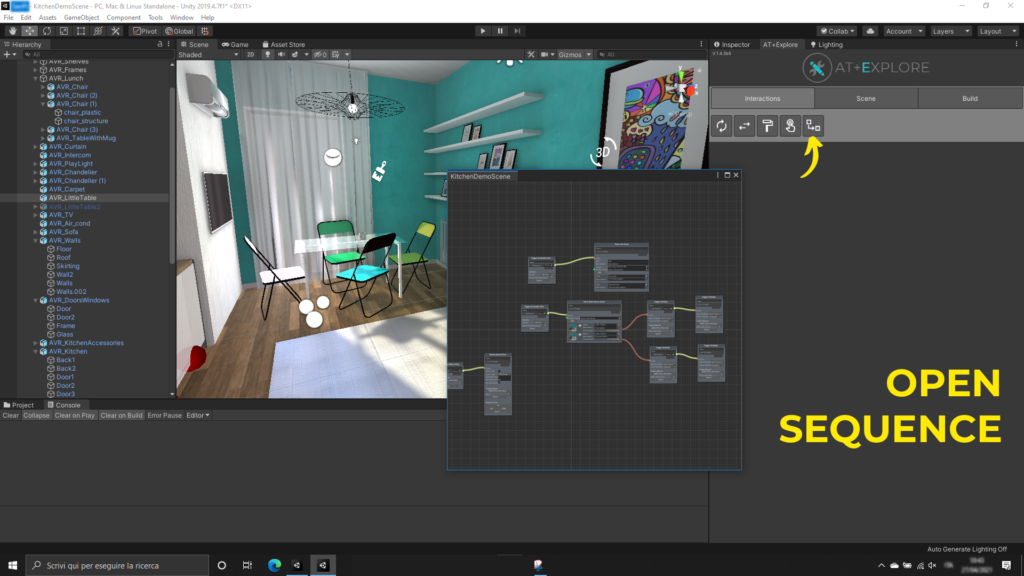
1_INTERACTION TAB
Once your scene is ready, you can count on this tab to add the magic.
Here you can find all fast-interaction buttons that will let you create dynamic doors, drawers, dynamic material switches and so on.
When you need to create a different set of interactions you can use the Action Sequence system.
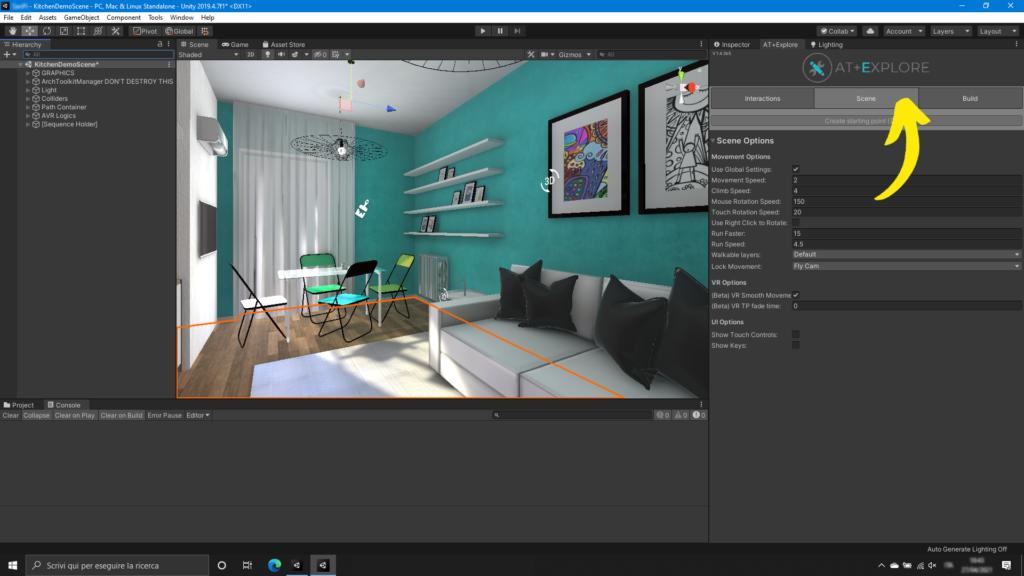
2_SCENE TAB
Contains all movement options like movement and rotation speeds and scene-specific options.
3_BUILD TAB
Introduced in v1.2, it contains all different build options.
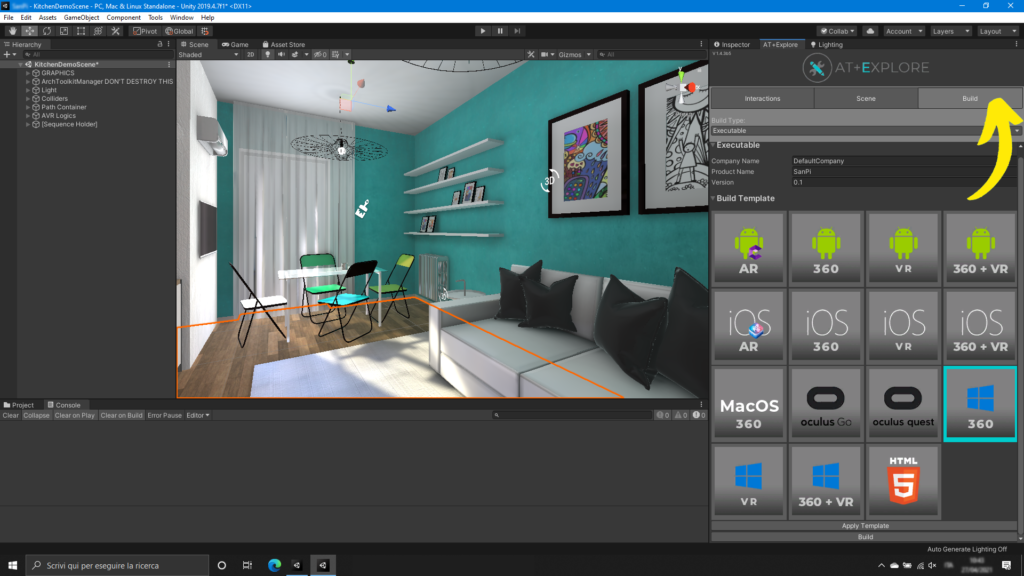
Every button is a “build template”. A build template is a mix of platform (PC, Android, iOS etc) and movement type (touchscreen, VR, AR etc).
When you select a build template you’ll need to click on “Apply Template”, this option will update the project options and needed packages via the package manager. IE. when you select Oculus Quest
Template Explore will do this set of operations automatically:
- Set the right graphics api
- Set the right platform
- Import XR Legacy input (needed as of v1.2 for VR)
- Import textmesh pro
- Setup the XR options
You can also choose to build the scene as an Asset bundle. This option can be useful when you’re deploying an application that needs to be updated after the deploy and can be easily set up using the Action Sequence.