The AR template is designed for 1:1 Augmented Reality projects. It lets you create digital versions of the real world and it needs markers for this real-to-digital link.
Please note that all scenes and interactions are the same, so for example you can choose to display the same scene via an Oculus Quest or your iPad in AR just by switching the build template.
AR Build Templates are currently in Beta, there are some things that do not reflect the way we want them to be:
- The template code is ready to use more than one marker simultaneously but it needs more refinement so right now we deeply discourage you to use more than one marker per scene.
- The template needs one additional step to do before building (see below).
How to add AR functionality to your project/scene
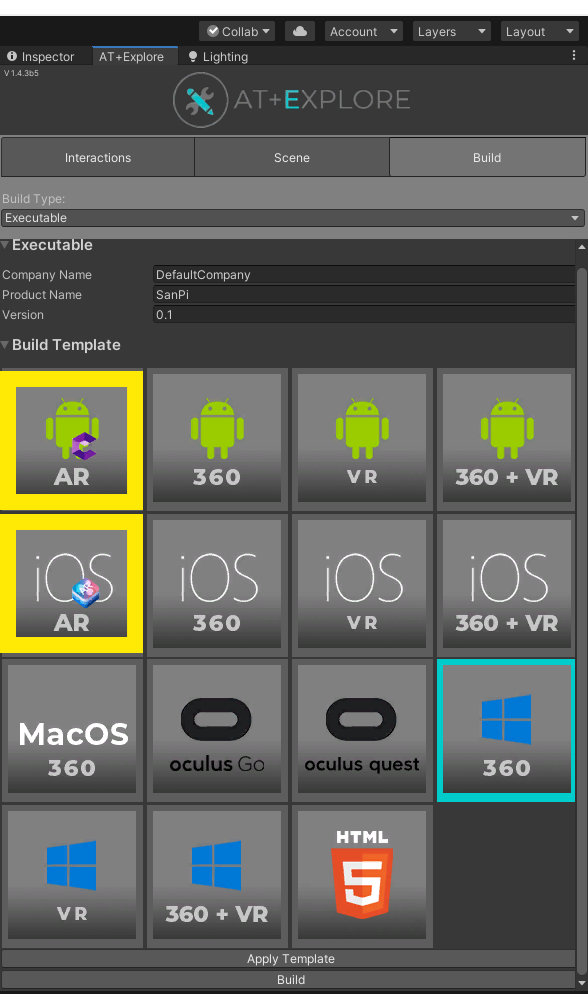
1. Switch template to iOS AR or Android AR.
In the AT+Explore Panel -> Tab Build -> Select Android AR or iOS AR -> Click Apply Template (image above)
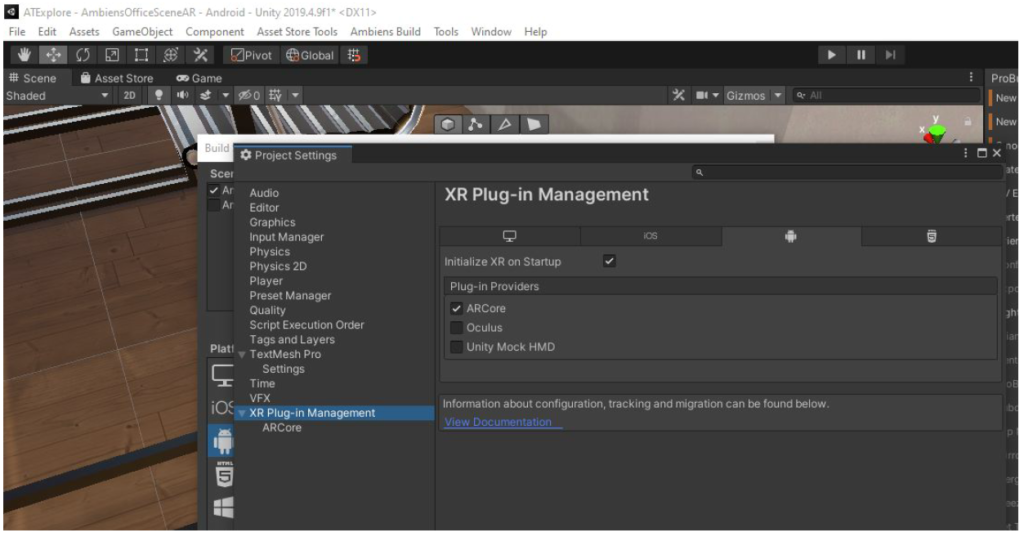
2. Enable XR Plugins (ARCore and ARKit)
Go to Edit->Project Settings->XR Plug-In Management and Enable AR Core (if you’re building on Android) or AR Kit (on iOS).
3. Add the Marker in the scene
The marker should be on the floor, use an edge to maximize the alignment between the virtual markerand the real one.

4. Print the marker from the included pdf and put it on the floor of the “real” World
We created 10 markers with the highest possible score of Image Recognition. You can select one of them and print it from the included PDF file.
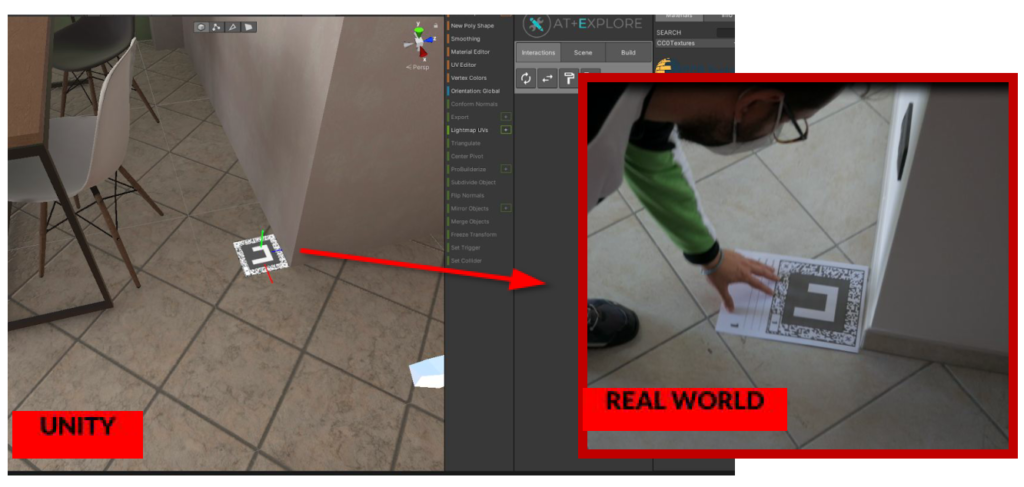
Please use A4 paper format for the marker. Until we say it explicitly, please use only one marker per scene, and put it on the floor (we’re working on multiple markers alignment for larger spaces).
5. Build your app
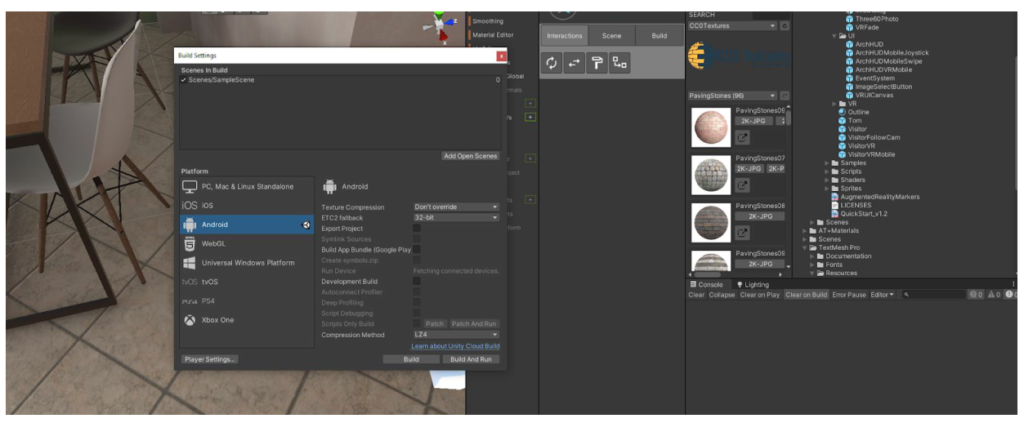
AT+Explore takes care of all the build options, you only need to add the scene to the Build panel (File -> Build Settings…) and then press build and run.